OmniView Process Software V2.5 – Lab Wizard Module

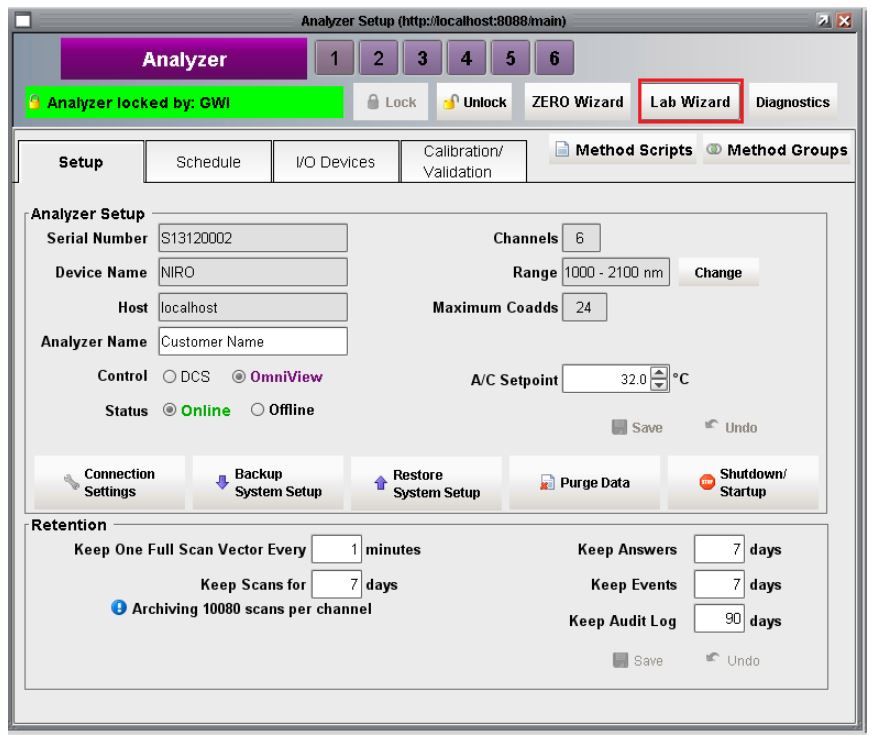
In June 2020, the engineering team completed testing on version 2.5 of the Omniview Process Control Software for the NIR-O Full Spectrum Process Analyzer. In addition to several bug fixes, this version introduces a wizard to help guided users on how to collect data for model creation and validation. The Lab Wizard is accessible from the analyzer setup window and acts as an alternative to Demand Scan functionality that has existed since version 1 of Omniview.

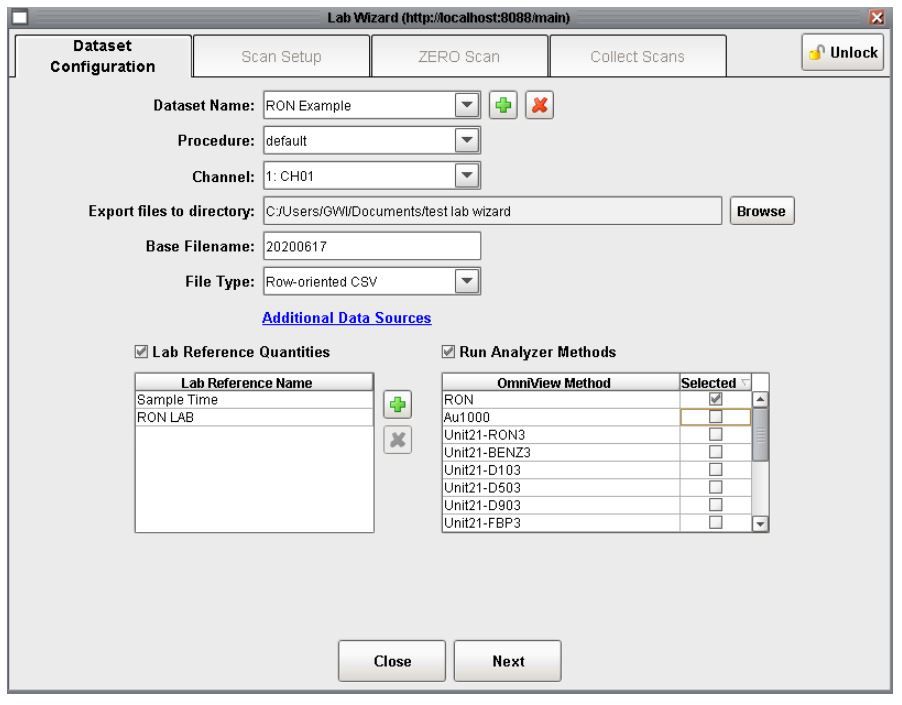
The lab wizard supports two use cases. The first mode is for the collection of data which will be used to create a new NIR calibration. The second mode is for QC operations and enables users to scan a series of samples with an existing NIR calibration. In both modes, the multiple scans can be exported into a single csv file for post-processing or manual submission to a LIMS system.

Overview

The Lab Wizard module was designed to allow users with a NIR-O process analyzer to collect on-demand scans and export them into a single file that is accessible by other software (Unscrambler© software, LIMS systems, etc.). The functionality of the Lab Wizard runs in parallel to the normal process software functionality. Changing channel configuration settings such as the number of scans to average (coadds) will also change the settings for the spectral data collected by the Scheduler. Additionally, the Scheduler can remain active while the Lab Wizard is running. This enables users to collect on demand scans on specific channels with minimal impact to ongoing operations.

Using the Lab Wizard

1) To enable the Lab Wizard button, click the Lock button,in the Analyzer window.

2) Click the Lab Wizard button to begin,

3) The Setup tab of the Lab wizard allows for the general scope or data-set of the on-demand scans to be defined. A user with Technician level privileges can only select a previously defined data-set from the drop down list. A user with Engineer level privileges can select an existing data-set or create a new data-set by clicking the plus button.

4) Once a data-set is selected, click the Next button to proceed to the Scan Setup tab.

Parameters that define a dataset include: file name prefix, file path to export scans to, selecting which channel spectra will be collected on, if any lab reference values will be supplied, if any existing models/methods should be called.  Additionally, lab required meta information such as the time that a sample was pulled can be entered as a lab reference value. The Procedure drop down list is currently a place holder

5. The Scan Setup tab allows for modification by a user with Engineer privileges to change the channel configuration.  

6. The ZERO Scan tab allows for the collection of ZERO scans and follows the same logic as the ZERO Wizard. Both Technician and Engineer users can collect a new zero or proceed with the existing zero scan.

7) The Collect Scans tab allows for data to be collected as defined by the previous tabs. If reference values were setup on the data configuration tab, the user will be prompted for them once the scan is completed. If a sample collection time is to be entered use the date format. Additionally, users will be prompted to provide a comment.  The comment can be a sample name or any other information that may be useful.  Both fields can be left blank. To collect a scan click the Perform Scan Button.

7) The lab reference value or sample scan time can be entered in the popup:

8) Once a scan is complete the spectrum will appear in the chart and tabulated data in the table above it. Additional scans added to the collection will appear in both the table and chart.

9) To export the collection of scan to a file, click the Export Collected Scans button.  The collection of scans and tabular information will be exported according to the previously selected file format (csv, gwj, etc)

10) Selecting scans in the table enables the deletion button. Scans removed from a collection are still stored in the database. Removing a scan simply removes it from the collection.  The entire collection can be deleted using the Clear Collection button.

11) A trend chart of Lab Wizard answers can be displayed by opening the Answer window and selecting the data from the list of available answers. At this time, lab reference values cannot be displayed inside of the OmniView process software. To generate a ‘Predicted vs Actual value chart, use the exported file of the collection.

For more information on how to use OmniView software see our YouTube Channel.

Questions? We’re here to help?